Billing Information
Team members listed as a billing contact will have access to Causey's billing center on the Organization Settings page. With this section, you can manage and cancel your plan.
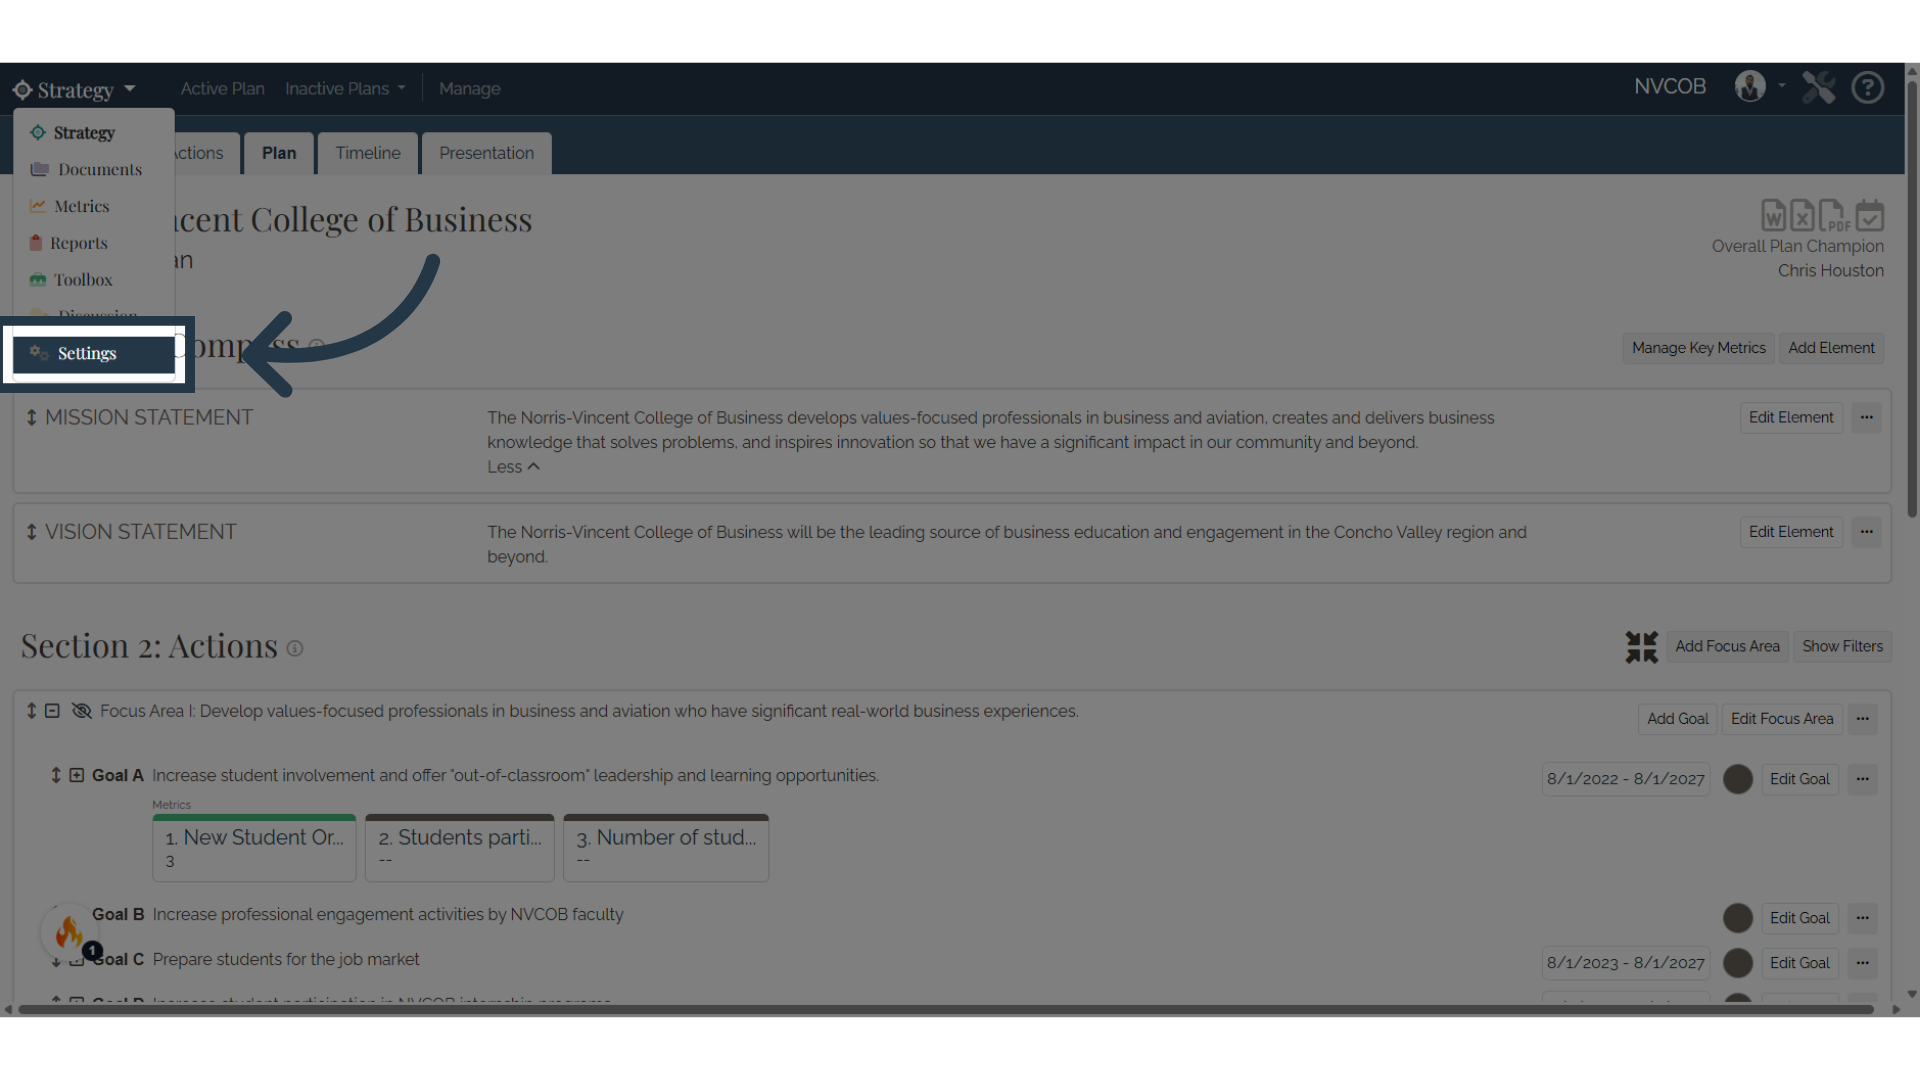
Access the Organization Settings page by selecting the drop-down menu in the top left corner. Select Settings.

Administrators set the billing contact in the All Team Members list on the Organization Settings page. A billing contact does not need to be an administrator. This contact should be the person in the organization who updates billing and payment information for the software subscription.

If you pay via credit card, you can select the Manage Billing button in the Organization Billing section. In this section you can change your plan, update your billing address and payment details, etc.
By selecting Manage Billing, you'll be taken to a billing page that includes more details about your plan.

You can also view and update your billing information (email and address).

View and pay your invoices in the Billing History section. Select the appropriate invoice. If a payment is due, enter a payment method to pay your invoice (payment methods can be saved for future use.) You can also download an invoice or receipt.

You can also cancel your plan by following the steps below:
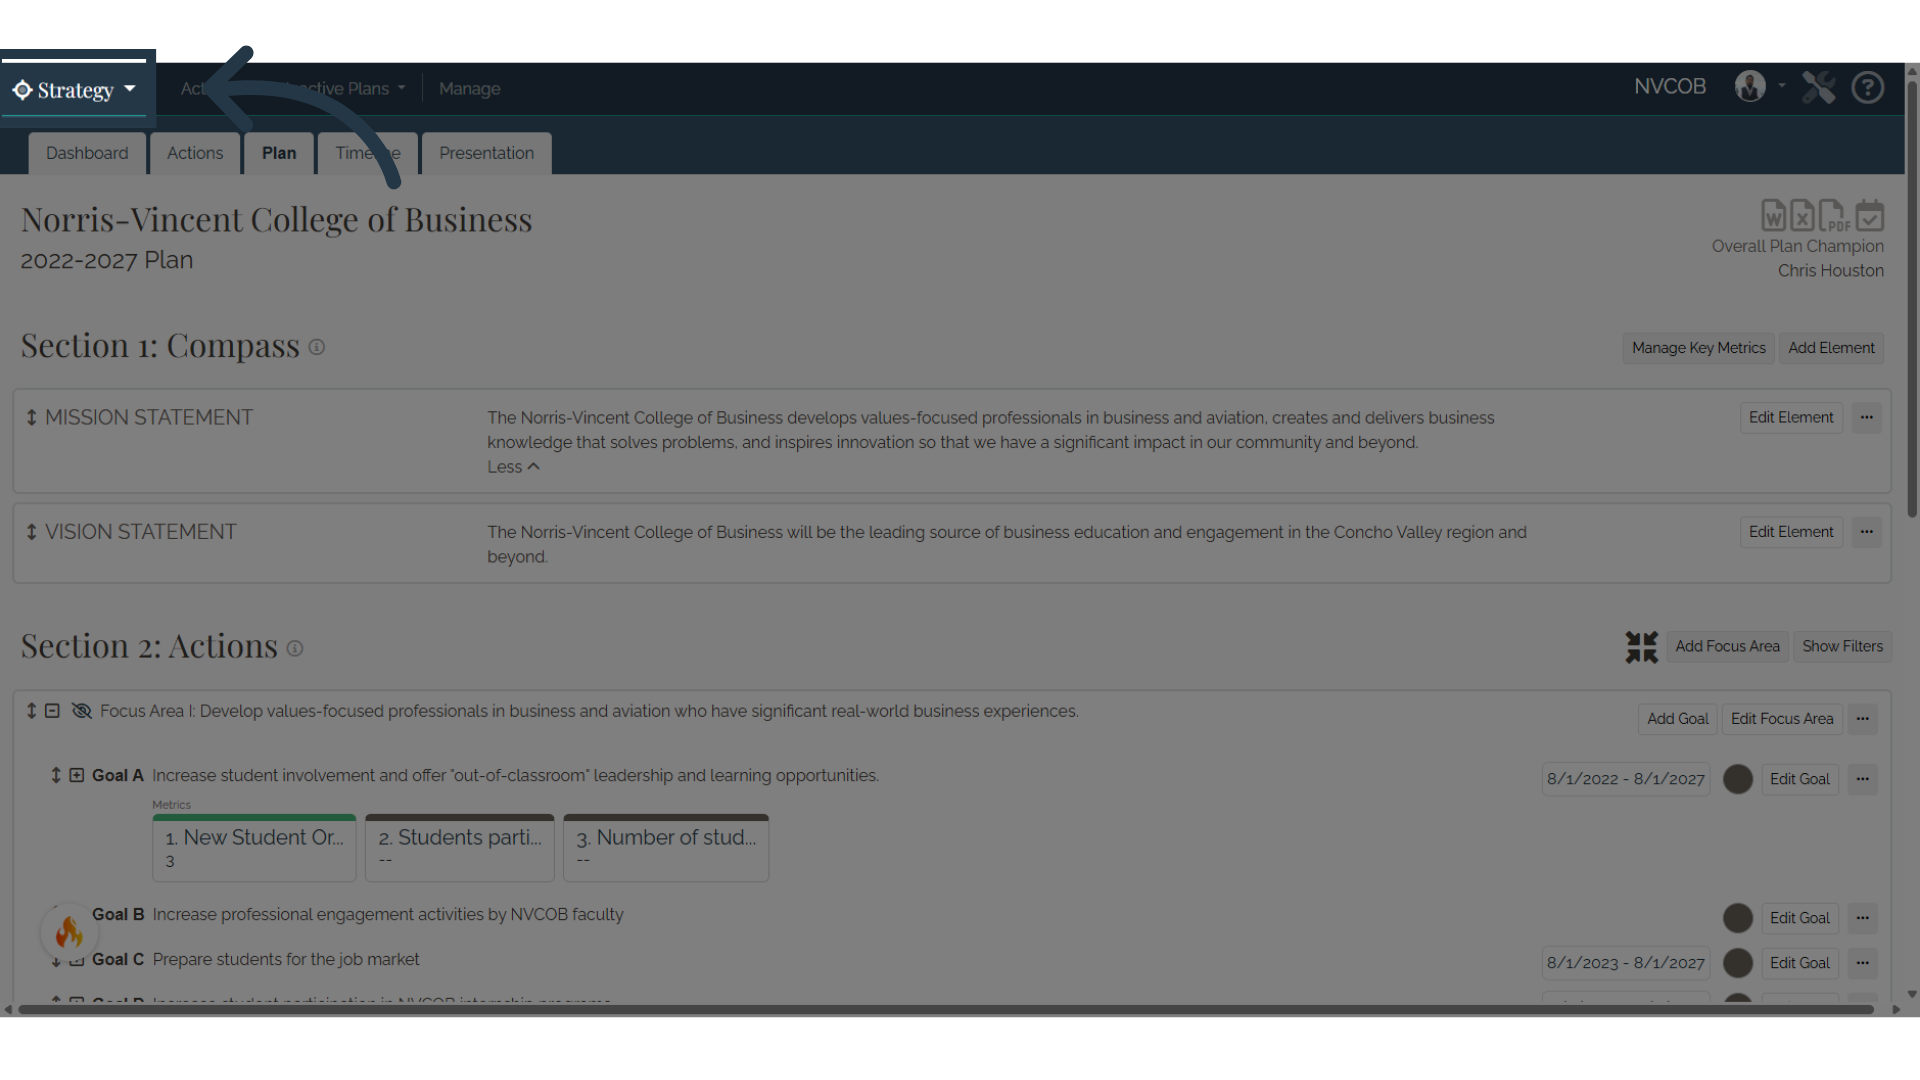
1. Click "Strategy"
2. Click "Settings"
3. Click "Cancel Subscription"

4. Choose reason
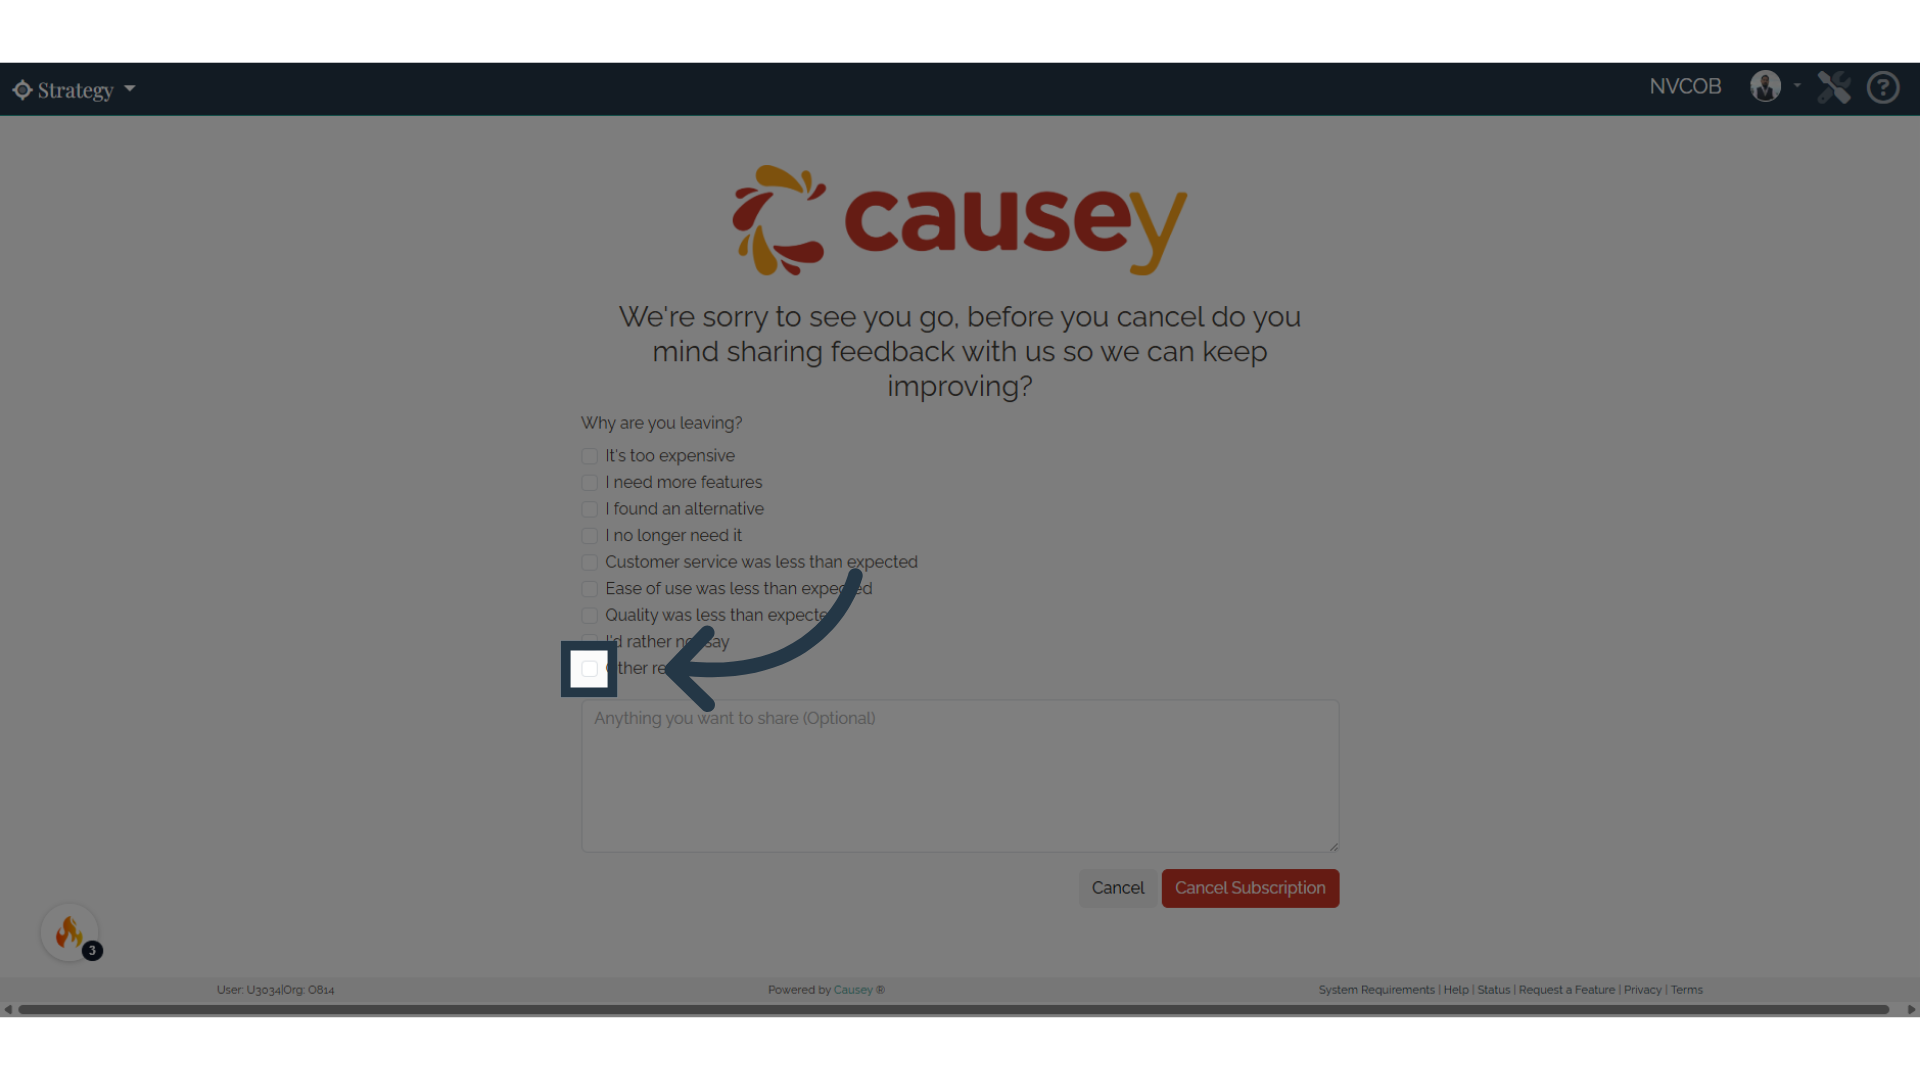
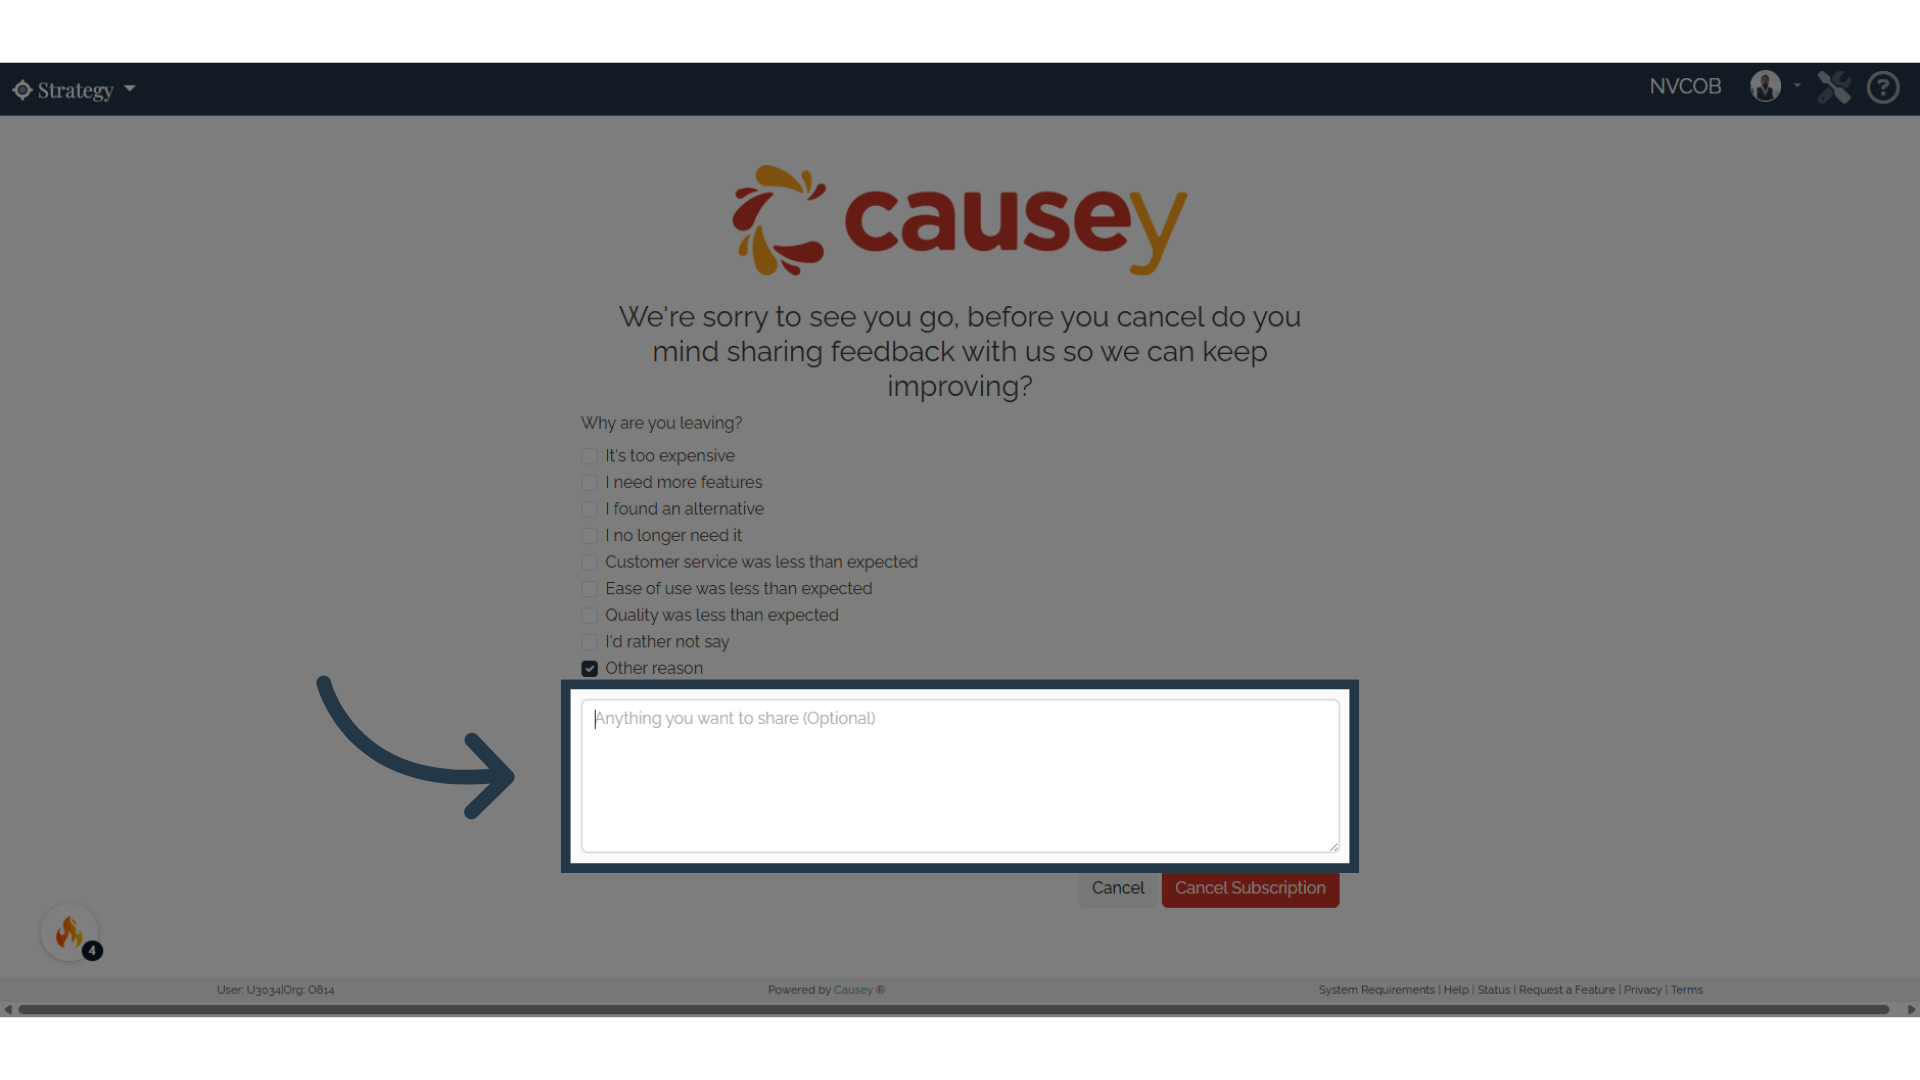
5. Click "Anything you want to share (Optional)"
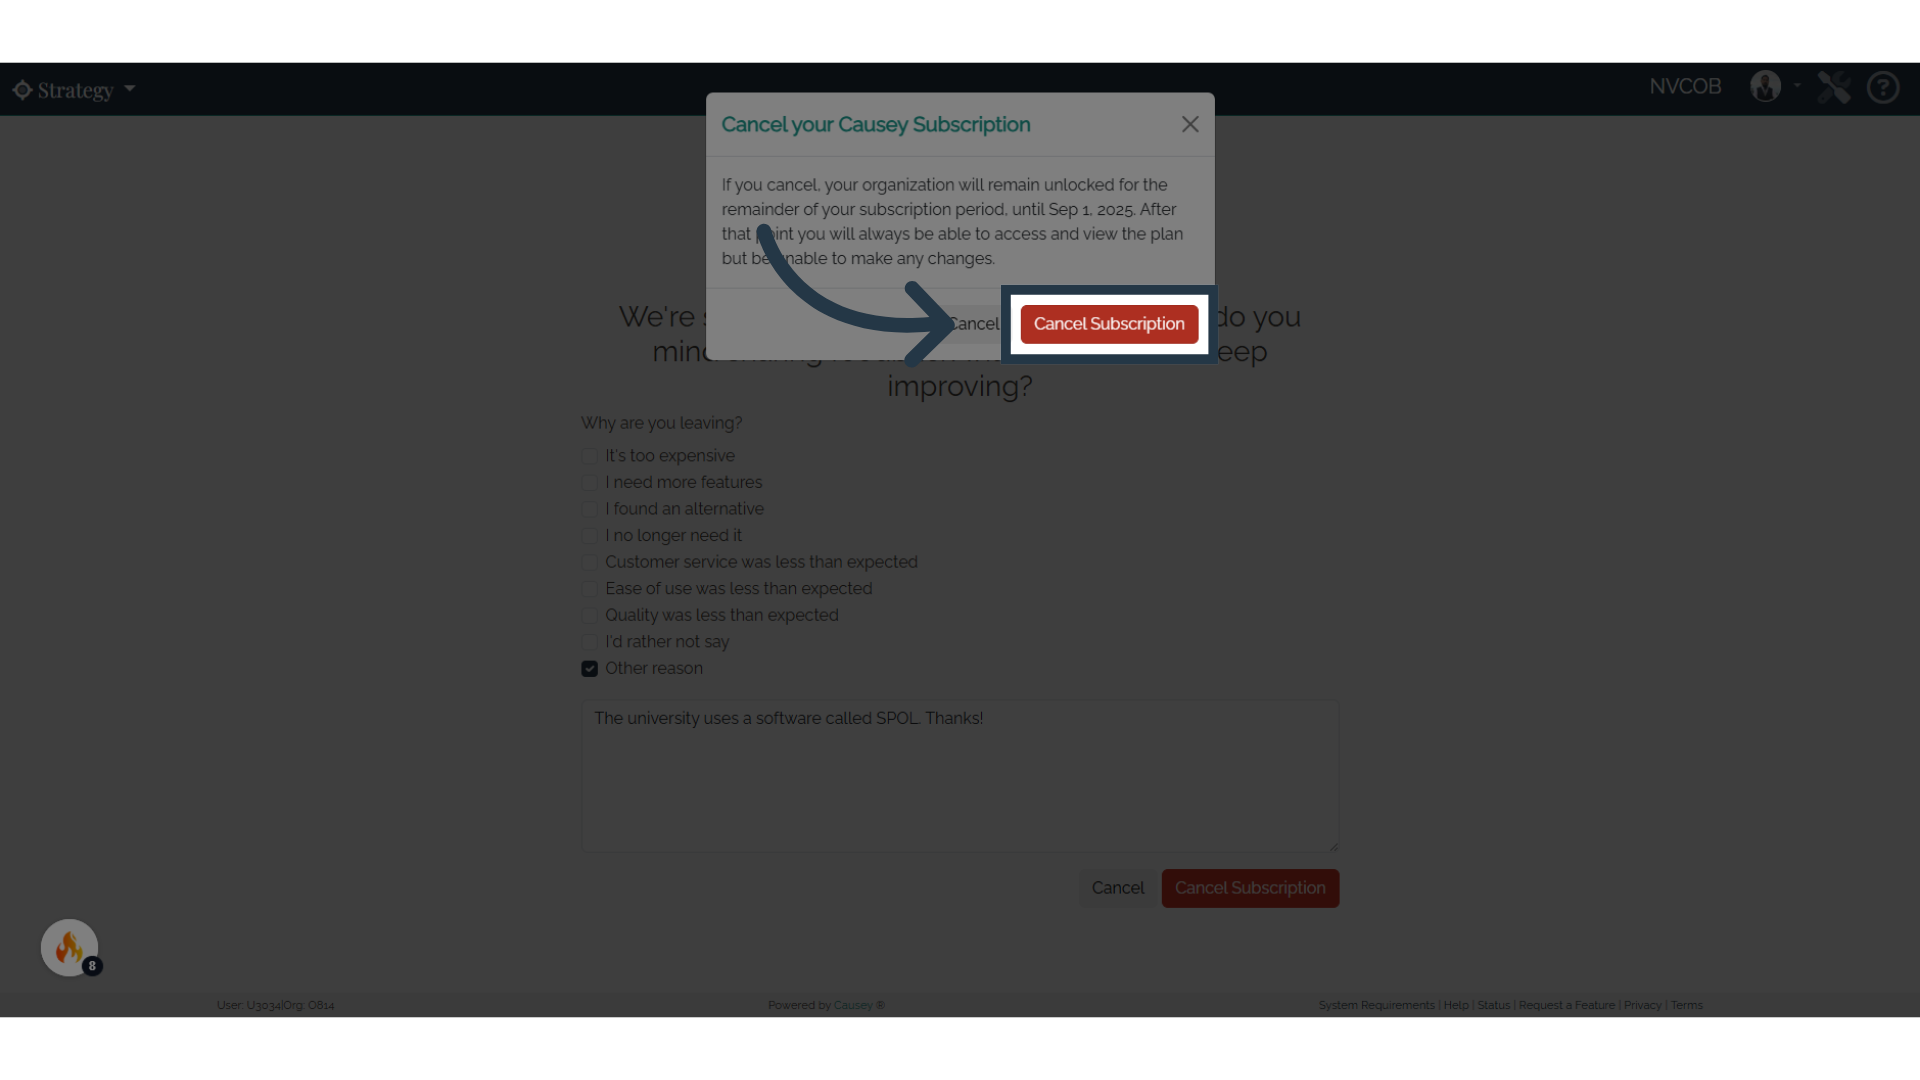
6. Click "Cancel Subscription"
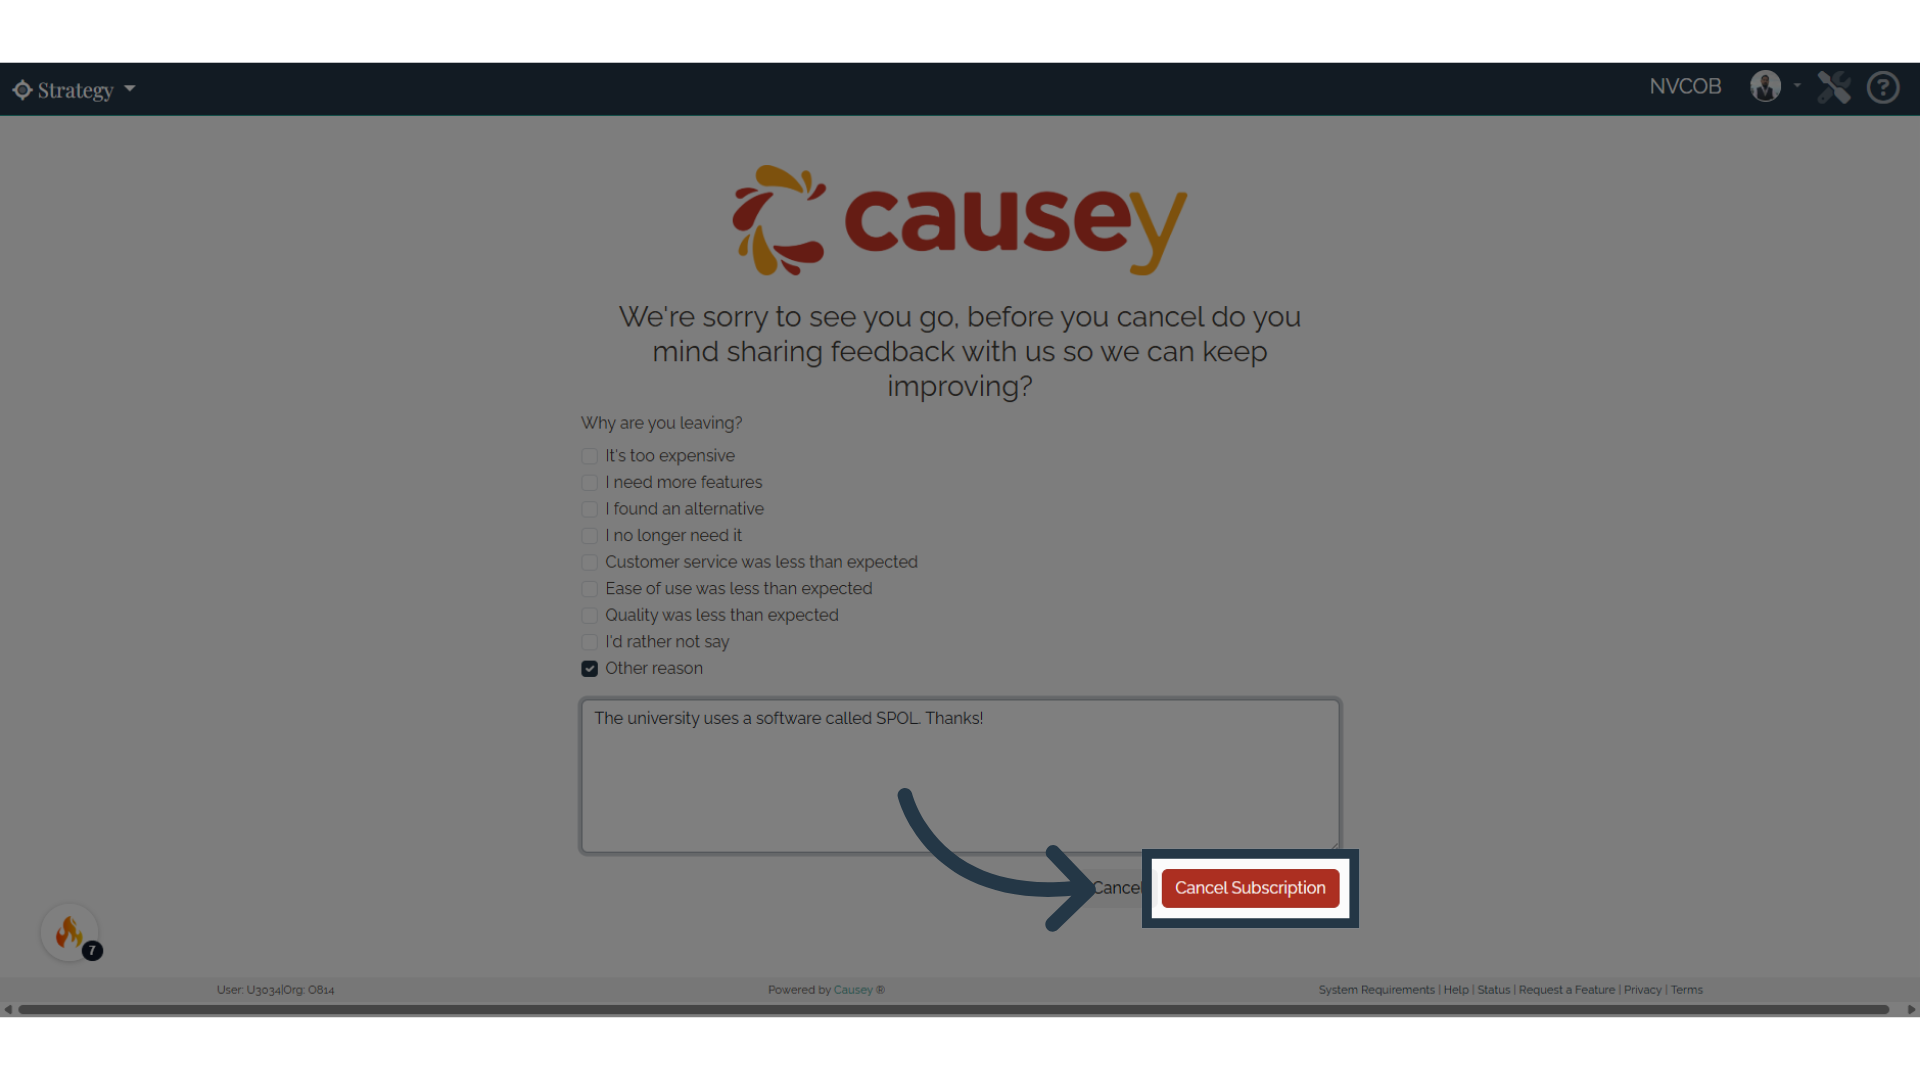
7. Click "Cancel Subscription"
